Caros colegas, através do Fedora 33 não consigo acessar a pasta compartilhada em rede de um computador servidor com Windows 10. Ao acessar via Samba, já previamente instalado e configurado conforme este passo-a-passo: samba-fedora-33 na tela que surge após a aba “Conectar a servidor” no gerenciador de arquivos do Fedora na parte Outros locais, onde digito smb://ip_do_servidor/ ou smb://ip_do_servidor/nome_da_pasta/ ou smb://nome_do_servidor/ ou smb://nome_do_servidor/nome_da_pasta/ ao pedir senha, digitá-la e clicar em conectar, fica num loop infinito nesta tela e não acessa as pastas em rede no servidor com Windows. O que fazer diante disto ou o que de errado eu tenho feito já que sou principiante no mundo Linux?
esse tutorial tá ensinando a como fazer um servidor samba na tua máquina fedora, não como conectar-se em uma
esta documentação tá meio defasada mas de acordo com ela, é só olhar na aba de rede que provavelmente ele aparece lá, ou digitar o endereço, como vc fez até o momento
e já que nada disso funcionou, eu dei uma olhada nas dependências opcionais do nautilus aqui e ele pede o gvfs, e, se não me engano, o gvfs tem outras dependencias opcionais uma delas sendo o “gvfs-smb”, então olha se acontece alguma coisa quando vc digita sudo dnf install gvfs-smb
Olá, obrigado por responder! Infelizmente não funcionou mesmo seguindo a sua orientação, ainda continua no loop infinito!
Olá, mesmo erro por aqui com Fedora versão 34 Workstation
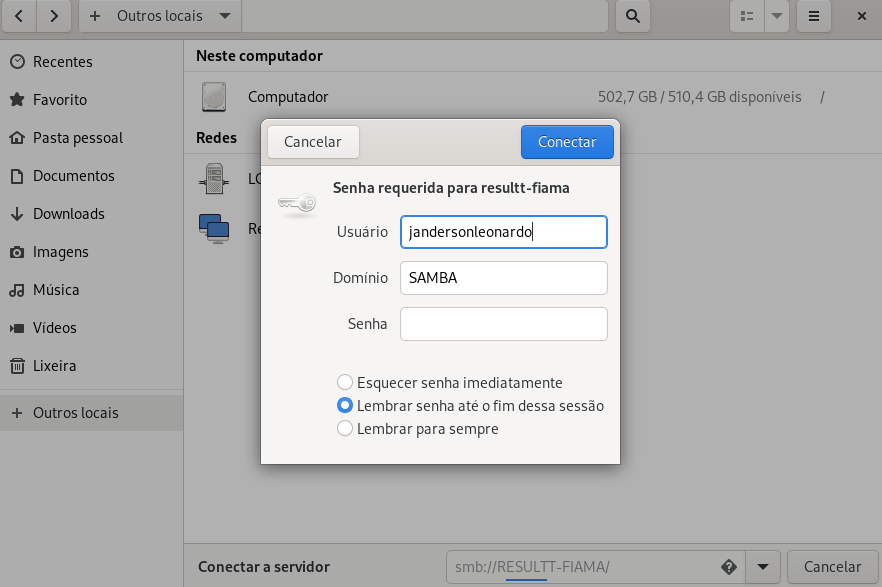
É necessário senha?
O usuário e senha foram criados.
Já viu na configuração do windows de compartilhamento?
Olah, sim, uso usuario e senha em outras distros linux e acessa normal.
Ok…
Quando puder passe a co figuração do smb.conf
Ok…
Veja se no smb.conf do fedora tem esta configuração
server string = Server Linux
netbios name = FEDORA
client min protocol = NT1
server min protocol = NT1
os serviços habilitados
Smb e nmb
E por fim
Se tiver firewall, abrir as portas para uso do samba
Se não me engano a porta 137 tem que ser udp e tcp…
Não me lembro depois eu vejo isso
Olá, ainda não consegui nada. Eis o meu smb.conf:
Sample configuration file for the Samba suite for Debian GNU/Linux.
smb.conf
#
#
# This is the main Samba configuration file. You should read the
# smb.conf(5) manual page in order to understand the options listed
# here. Samba has a huge number of configurable options most of which
# are not shown in this example
#
# Some options that are often worth tuning have been included as
# commented-out examples in this file.
#  - When such options are commented with ";", the proposed setting
#    differs from the default Samba behaviour
#  - When commented with "#", the proposed setting is the default
#    behaviour of Samba but the option is considered important
#    enough to be mentioned here
#
# NOTE: Whenever you modify this file you should run the command
# "testparm" to check that you have not made any basic syntactic
# errors.

#======================= Global Settings =======================

[global]

client min protocol = NT1

## Browsing/Identification ###

# Change this to the workgroup/NT-domain name your Samba server will part of
   workgroup = WORKGROUP

# server string is the equivalent of the NT Description field
   server string = Server Linux

#### Networking ####

# The specific set of interfaces / networks to bind to
# This can be either the interface name or an IP address/netmask;
# interface names are normally preferred
;   interfaces = 127.0.0.0/8 eth0

# Only bind to the named interfaces and/or networks; you must use the
# 'interfaces' option above to use this.
# It is recommended that you enable this feature if your Samba machine is
# not protected by a firewall or is a firewall itself.  However, this
# option cannot handle dynamic or non-broadcast interfaces correctly.
;   bind interfaces only = yes


#### Debugging/Accounting ####

# This tells Samba to use a separate log file for each machine
# that connects
   log file = /var/log/samba/log.%m

# Cap the size of the individual log files (in KiB).
   max log size = 1000

# We want Samba to only log to /var/log/samba/log.{smbd,nmbd}.
# Append syslog@1 if you want important messages to be sent to syslog too.
   logging = file

# Do something sensible when Samba crashes: mail the admin a backtrace
   panic action = /usr/share/samba/panic-action %d


####### Authentication #######

# Server role. Defines in which mode Samba will operate. Possible
# values are "standalone server", "member server", "classic primary
# domain controller", "classic backup domain controller", "active
# directory domain controller".
#
# Most people will want "standalone server" or "member server".
# Running as "active directory domain controller" will require first
# running "samba-tool domain provision" to wipe databases and create a
# new domain.
   server role = standalone server

   obey pam restrictions = yes

# This boolean parameter controls whether Samba attempts to sync the Unix
# password with the SMB password when the encrypted SMB password in the
# passdb is changed.
   unix password sync = yes

# For Unix password sync to work on a Debian GNU/Linux system, the following
# parameters must be set (thanks to Ian Kahan <<kahan@informatik.tu-muenchen.de> for
# sending the correct chat script for the passwd program in Debian Sarge).
   passwd program = /usr/bin/passwd %u
   passwd chat = *Enter\snew\s*\spassword:* %n\n *Retype\snew\s*\spassword:* %n\n *password\supdated\ssuccessfully* .

# This boolean controls whether PAM will be used for password changes
# when requested by an SMB client instead of the program listed in
# 'passwd program'. The default is 'no'.
   pam password change = yes

# This option controls how unsuccessful authentication attempts are mapped
# to anonymous connections
   map to guest = bad user

########## Domains ###########

#
# The following settings only takes effect if 'server role = primary
# classic domain controller', 'server role = backup domain controller'
# or 'domain logons' is set
#

# It specifies the location of the user's
# profile directory from the client point of view) The following
# required a [profiles] share to be setup on the samba server (see
# below)
;   logon path = \\%N\profiles\%U
# Another common choice is storing the profile in the user's home directory
# (this is Samba's default)
#   logon path = \\%N\%U\profile

# The following setting only takes effect if 'domain logons' is set
# It specifies the location of a user's home directory (from the client
# point of view)
;   logon drive = H:
#   logon home = \\%N\%U

# The following setting only takes effect if 'domain logons' is set
# It specifies the script to run during logon. The script must be stored
# in the [netlogon] share
# NOTE: Must be store in 'DOS' file format convention
;   logon script = logon.cmd

# This allows Unix users to be created on the domain controller via the SAMR
# RPC pipe.  The example command creates a user account with a disabled Unix
# password; please adapt to your needs
; add user script = /usr/sbin/adduser --quiet --disabled-password --gecos "" %u

# This allows machine accounts to be created on the domain controller via the
# SAMR RPC pipe.
# The following assumes a "machines" group exists on the system
; add machine script  = /usr/sbin/useradd -g machines -c "%u machine account" -d /var/lib/samba -s /bin/false %u

# This allows Unix groups to be created on the domain controller via the SAMR
# RPC pipe.
; add group script = /usr/sbin/addgroup --force-badname %g

############ Misc ############

# Using the following line enables you to customise your configuration
# on a per machine basis. The %m gets replaced with the netbios name
# of the machine that is connecting
;   include = /home/samba/etc/smb.conf.%m

# Some defaults for winbind (make sure you're not using the ranges
# for something else.)
;   idmap config * :              backend = tdb
;   idmap config * :              range   = 3000-7999
;   idmap config YOURDOMAINHERE : backend = tdb
;   idmap config YOURDOMAINHERE : range   = 100000-999999
;   template shell = /bin/bash

# Setup usershare options to enable non-root users to share folders
# with the net usershare command.

# Maximum number of usershare. 0 means that usershare is disabled.
#   usershare max shares = 100

# Allow users who've been granted usershare privileges to create
# public shares, not just authenticated ones
   usershare allow guests = yes

#======================= Share Definitions =======================

# Un-comment the following (and tweak the other settings below to suit)
# to enable the default home directory shares. This will share each
# user's home directory as \\server\username
;[homes]
;   comment = Home Directories
;   browseable = no

# By default, the home directories are exported read-only. Change the
# next parameter to 'no' if you want to be able to write to them.
;   read only = yes

# File creation mask is set to 0700 for security reasons. If you want to
# create files with group=rw permissions, set next parameter to 0775.
;   create mask = 0700

# Directory creation mask is set to 0700 for security reasons. If you want to
# create dirs. with group=rw permissions, set next parameter to 0775.
;   directory mask = 0700

# By default, \\server\username shares can be connected to by anyone
# with access to the samba server.
# Un-comment the following parameter to make sure that only "username"
# can connect to \\server\username
# This might need tweaking when using external authentication schemes
;   valid users = %S

# Un-comment the following and create the netlogon directory for Domain Logons
# (you need to configure Samba to act as a domain controller too.)
;[netlogon]
;   comment = Network Logon Service
;   path = /home/samba/netlogon
;   guest ok = yes
;   read only = yes

# Un-comment the following and create the profiles directory to store
# users profiles (see the "logon path" option above)
# (you need to configure Samba to act as a domain controller too.)
# The path below should be writable by all users so that their
# profile directory may be created the first time they log on
;[profiles]
;   comment = Users profiles
;   path = /home/samba/profiles
;   guest ok = no
;   browseable = no
;   create mask = 0600
;   directory mask = 0700

[printers]
   comment = All Printers
   browseable = no
   path = /var/spool/samba
   printable = yes
   guest ok = no
   read only = yes
   create mask = 0700

# Windows clients look for this share name as a source of downloadable
# printer drivers
[print$]
   comment = Printer Drivers
   path = /var/lib/samba/printers
   browseable = yes
   read only = yes
   guest ok = no
# Uncomment to allow remote administration of Windows print drivers.
# You may need to replace 'lpadmin' with the name of the group your
# admin users are members of.
# Please note that you also need to set appropriate Unix permissions
# to the drivers directory for these users to have write rights in it
;   write list = root, @lpadmin
Estou com a mesma dificuldade.
A parte que eu acho MUITO interessante é que quando eu usava o Linux Mint, eu acessava tranquilamente as pastas compartilhadas de rede de computadores com Windows e vice versa. Resolvi montar um live pendrive com o Mint, pelo live consegui listar e acessar normalmente as pastas compartilhadas do Windows. Copiei o arquivo smb.conf do live e colei no smb.conf do Fedora 34, porém a dificuldade persiste.
Qual é a diferença de configurações de rede Fedora x Mint?
Eu iria editar minha última resposta, mas achei mais interessante por questão dos alertas para as pessoas que estão acompanhando, criar uma nova resposta…
Encontrei um post onde a pessoa orientava alguns procedimentos e à partir disso passei a conseguir montar a pasta compartilhada… Então vamos ao que funcionou para mim…
Abra o terminal e digite os comandos:
sudo chmod u+s /bin/mount
sudo chmod u+s /bin/umount
sudo chmod u+s /usr/sbin/mount.cifs
À partir disso eu já conseguia montar através do terminal SEM PEDIDO de usuário e senha as pastas compartilhadas do Windows, porém sem autorizações de escrita, apenas leitura. Qualquer alterações que eu quisesse fazer nos arquivos eu tinha que usar sudo (!?)…
Como eu sempre utilizo a pasta compartilhada, eu setei ela para montar na inicialização do Fedora da seguinte forma:
Abra o terminal
sudo nano /etc/fstab
Insira no final do arquivo a montagem da seguinte forma:
//ip_pc_windows/pasta_compartilhada /pasta_do_sistema/local_da_montagem cifs username=root,password=123,dir_mode=0777,file_mode=0777 0 0
Salve o arquivo com ctrl+O, Enter, ctrl+X
SIM! o username e password foram estes mesmos e teriam sido qualquer coisa que eu digitasse… Por quê? Não entendi isso até o momento, apenas sei que sem eles identificados a montagem não se faz corretamente…
Pronto!
Para saber se está funcionando, digite no terminal:
sudo mount -a
Deve aparecer no navegador de arquivos a pasta compartilhada, montada.
Espero que ajude à quem precisar.
1 curtida
Já verificou se pode ser o Firewall bloqueando? Abra a gnome software (loja) procure por Firewall e instale. Dps verifique se o serviço smb está liberado.